Install#
Overview#
ide49 is a Balena Cloud application, a Docker framework customized for iot devices with limited resources.
To install ide49, you need the following:
Hardware:
Host device: one of
Raspberry Pi 4 (2GBytes suffice for iot49)
Raspberry Pi 3
Intel NUC or compatible
Other 64-Bit ARM or Intel CPUs (
aarch64oramd64) may work as well.SD Card with at least 16GBytes. A good quality card is highly recommended, e.g. Sandisk Max Endurance or Samsung Pro Endurance.
Intel NUC or compatibles usually have internal storage. An SD Card is not needed in this case.
A networked computer (e.g. a laptop) with an SD Card slot (only used for installation)
Software:
Web-browser (e.g. Chrome)
All access is from a browser
Balena Etcher, available for Mac, Window, and Linux
Used only for installation
Installation Options#
Two options for installing ide49:
Quick install: Download the operating system to the SD card, wait for the app to download and start using it. It’s that simple. Even updates are automated.
Custom installation: Install from gitbub sources. Gives complete control - you can modify everything you like, e.g. add additional Docker services - right from within ide49. For this option you need a free account on balena.io (no credit card needed).
Disclosure: I have no affiliation with Balena except using their software and infrastructure - for free.
Jump to the appropriate section in the documentation to start the installation.
Quick Install#
Choose the appropriate link for your device architecture:
On the page that opens, click “Get started”. Select your device type and network connection (wifi+ethernet unless you use a wired connection). From the Flash dropdown, choose Download balenaOS (clicking the Flash button directly may work also, but not for me).
Flash the downloaded OS image to the SD Card using Balena Etcher. Insert the card into the PI and apply power.
Once the OS is installed ide49 will download and install automatically. Depending on the networks speed, this may take upwards of ten minutes (or an hour with my glacially slow Internet). After the download completes, ide49 starts automatically. Connect your computer to the same network and point the browser to http://iot49.local.
If this does not work the download and setup may not be complete. Try to “ping” the device (at iot49.local) or determine the local address of your device (e.g. from the router or access point) and try http://LOCAL_IP_ADDRESS.
Proceed to the next section, Getting Started.
Custom Install#
These instructions are for installing ide49 from source. The installation is fully configurable, including modifying and adding/removing Docker containers - all from within ide49.
Create an account on balena.io or login to your existing account.
Open the ide49 repository on github and click the
 button.
In the popup window, choose a name for your application (e.g. ide49). Click advanced and set the timezone (TZ) to the desired value. Click here for a list of valid TZ names.
Leave the other variables at their defaults (they can be changed later) and click Create and Deploy. The browser is redirected to the Balena dashboard for the ide49 application. Click + Add device. You get another popup:
under edition, select
Developmentclick the
Wifi + Ethernetbutton and enter your WiFi credentials
Accept the defaults for everything else and hit the Download balenaOS button. Keep the browser window open to check the progress of the installation.
If you have a Raspberry PI, flash the downloaded OS image to the SD Card using Balena Etcher. Transfer the card to the PI and apply power.
Intel NUC or compatibles typically install the OS from a thumb drive or other external medium to the internal disk. Follow the instructions at the Balena website.
The computer will boot and configure the OS and download the ide49 application. Head back to the browser window with the Balena dashboard and wait a few minutes for the new device to appear.
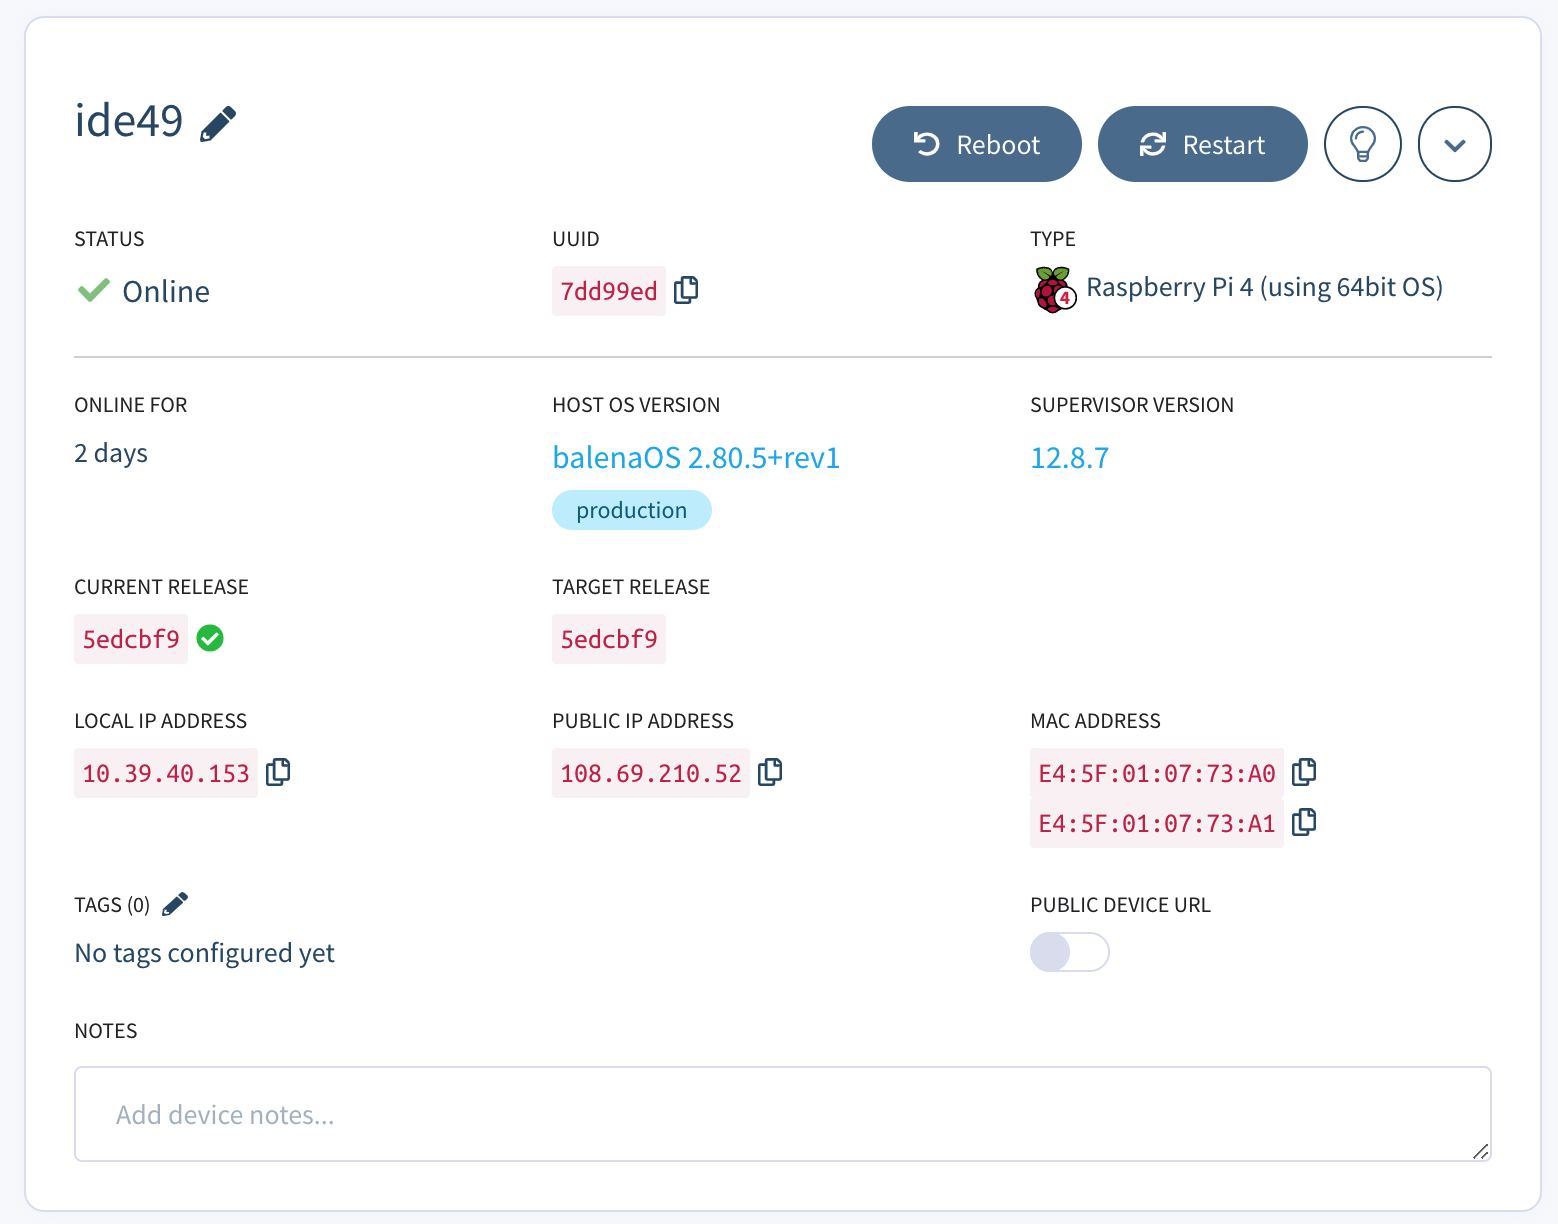
Fig. 1 Balena dashboard#
The new device has some creative name (like hidden-sun). Click on the device name. The top of the page show poetic device name. Click the pencil to change it. Also listed are some statistics (memory usage, device temperature, local ip address, etc).

Fig. 2 Device status information#
Click the application name in the Balena dashboard and wait for the release to complete (about twenty minutes). Once it’s complete, the Balena will automatically download ide49. You can see the progress in the device window with populates itself with a list of services.
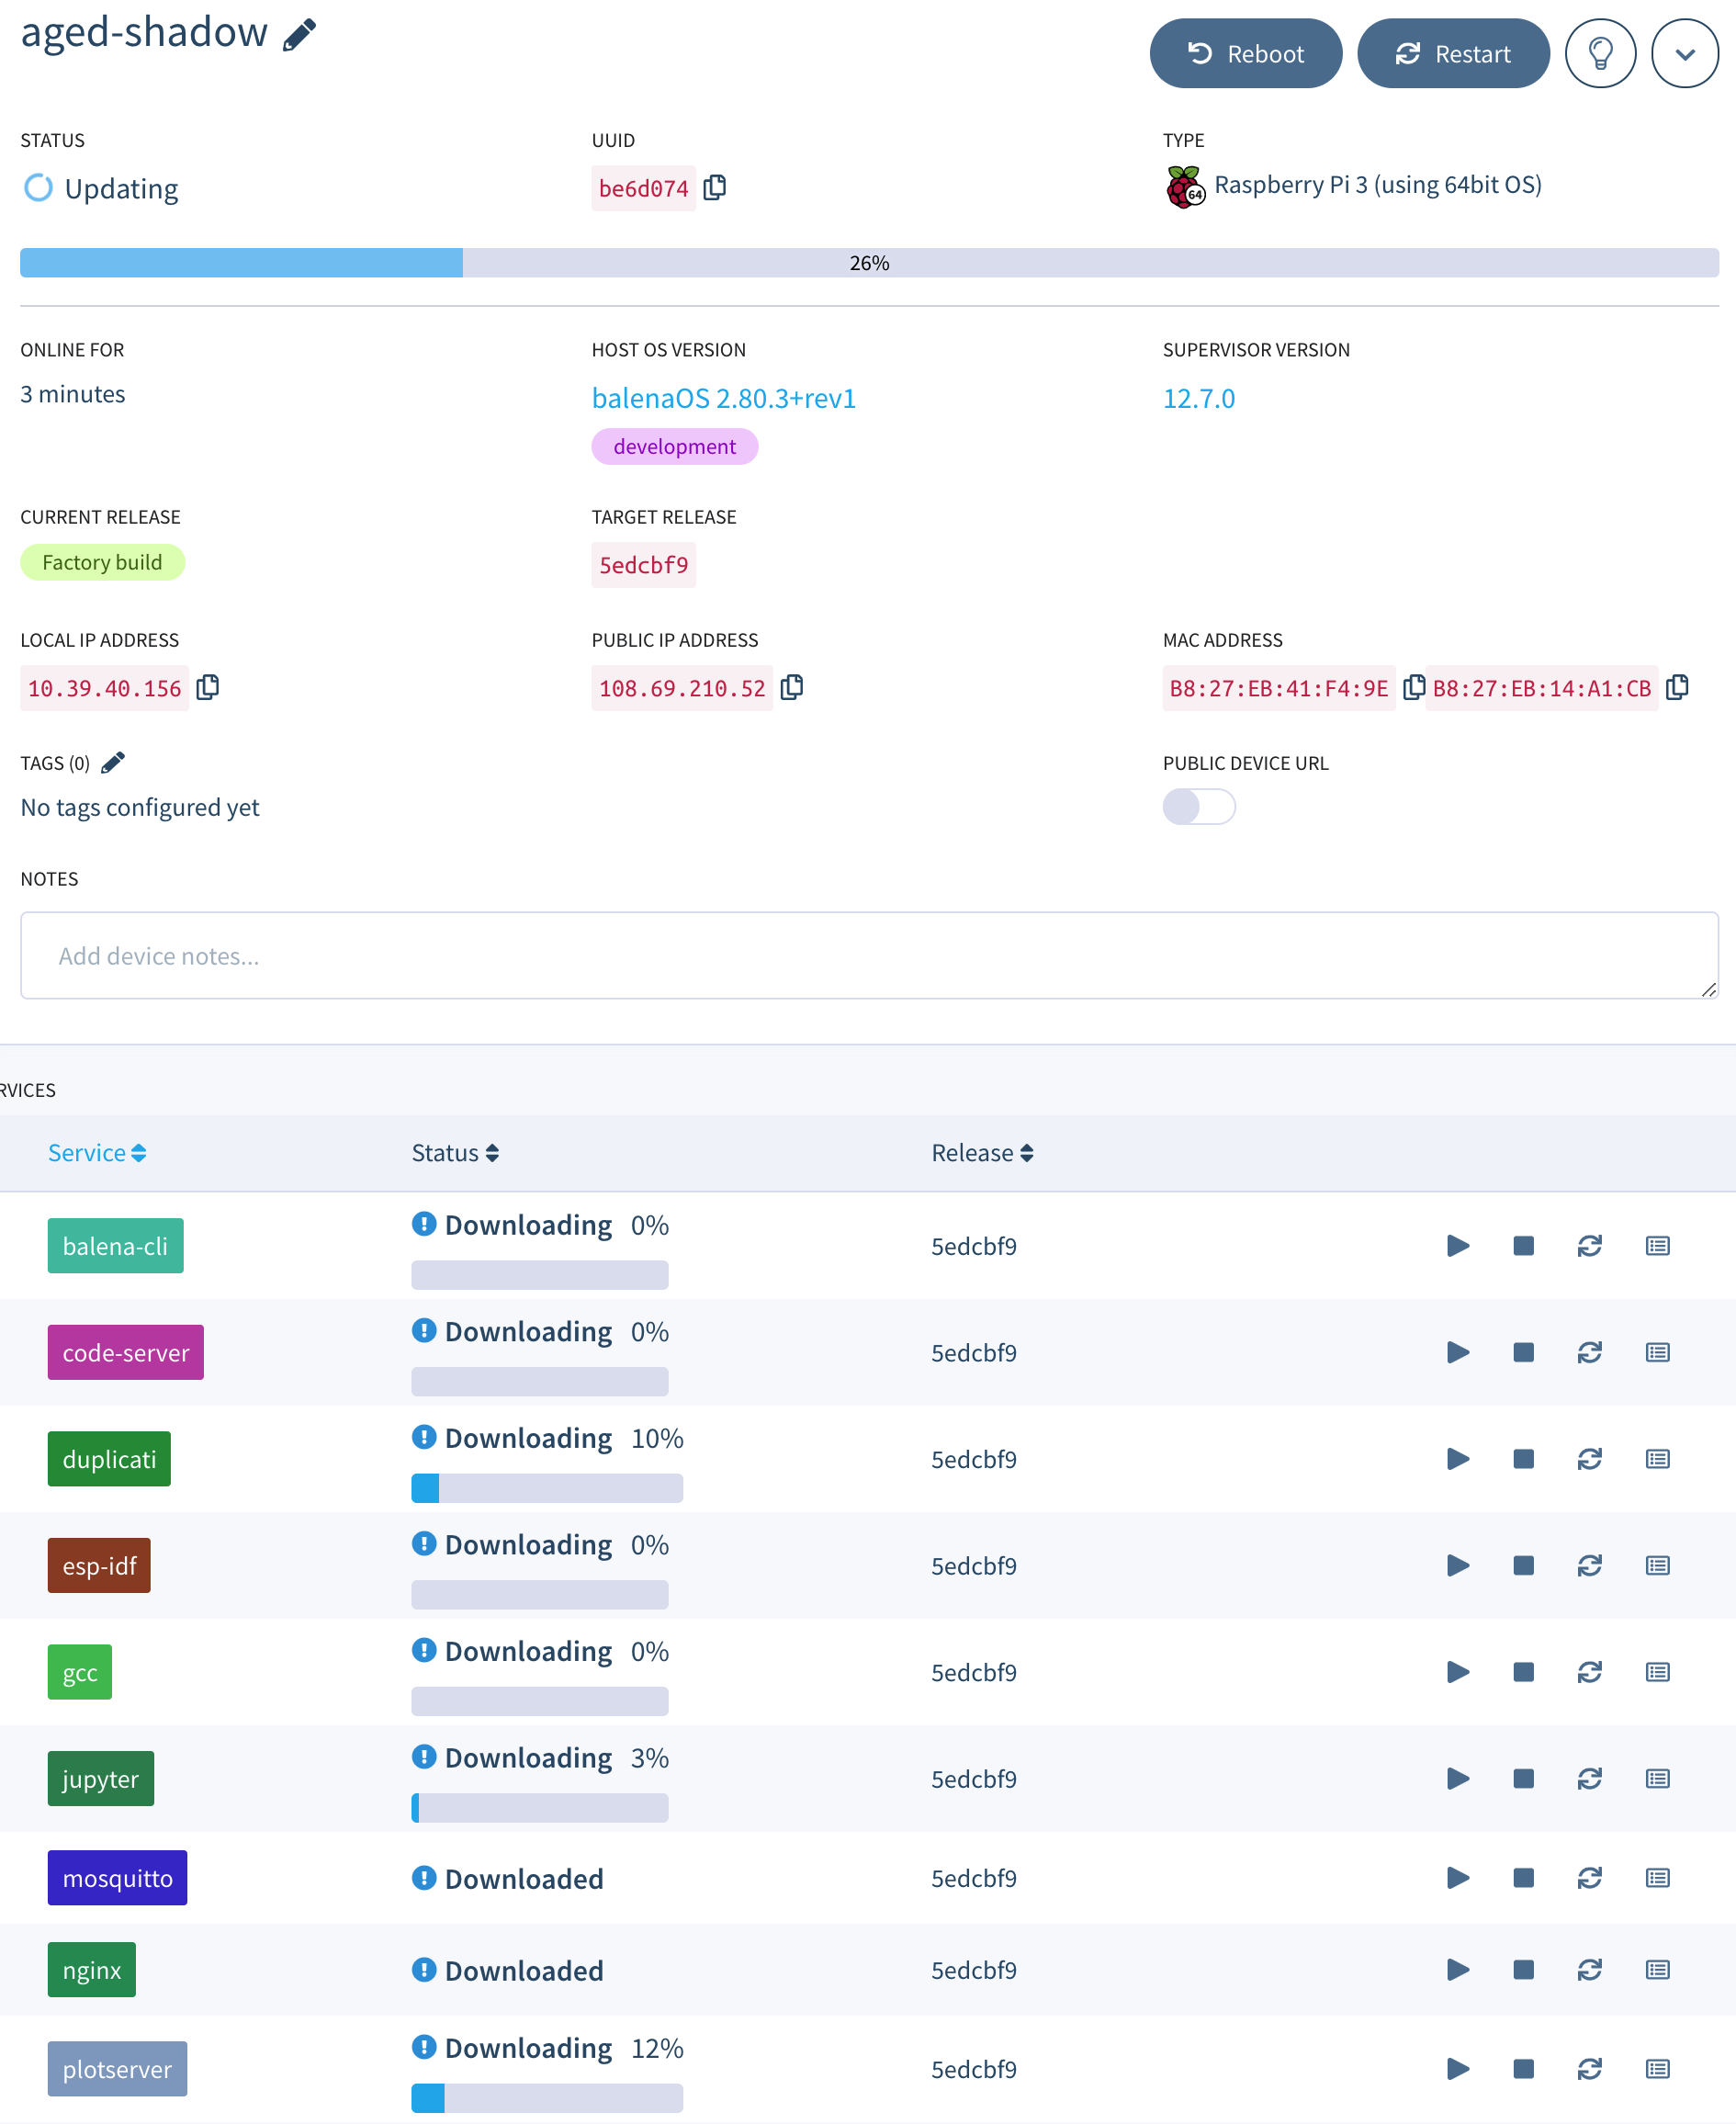
Fig. 3 Download progress#
After the download completes the application will automatically start and status of the services will switch to Running.
Connect at http://iot49.local.
If this does not work, try http://LOCAL_IP_ADDRESS instead. Substitute the value LOCAL_IP_ADDRESS with the address shown in the Balena dashboard.